Sistem odası Sıcaklık ve Nem Takip (Arduino)

Merhaba Arkadaşlar,
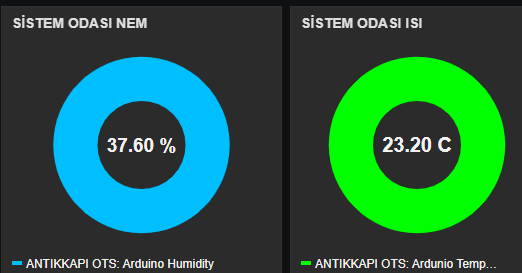
Bu yazımda sizlere sistem odası için Arduino, DHT22 sıcaklık ve nem sensörü ile Ethernet Shield (Wiznet W5100) kullanarak tasarladığım bir projeden bahsedeceğim.
Bu uygulama sayesinde, sistem odasındaki sıcaklık veya nem belirlediğiniz eşik değerlerini aştığında, sistem otomatik olarak size e-posta yoluyla bildirim göndermektedir. Böylece, ortam koşullarını uzaktan takip edebilir ve olası risklere karşı önlem alabilirsiniz.
Projenin amacı, özellikle sunucu ve ağ ekipmanlarının bulunduğu ortamlarda kritik öneme sahip sıcaklık ve nem değerlerini izlemek ve olası olumsuzluklarda kullanıcıyı anında bilgilendirmektir.
Kod:
#include <SPI.h>
#include <Ethernet.h>
#include "DHT.h"
#include <LiquidCrystal_I2C.h>
#include <Wire.h>

//Constants
#define DHTPIN 2     // what pin we're connected to
#define DHTTYPE DHT22   // DHT 22  (AM2302)
LiquidCrystal_I2C lcd(0x27,16,2);
DHT dht(DHTPIN, DHTTYPE);
//------------------------------
// Ethernet Bağlantı Kodları
byte mac[] = { 0x90, 0xA2, 0xDA, 0x00, 0x59, 0x62 };   //mac oluşturan sitelerden oluşturabilirsiniz
// change network settings to yours
IPAddress ip( 192, 168, 1, 3 );  //ardunio cihaz icin ip adresi
IPAddress gateway( 192, 168, 1, 1 ); //gw ip adresiniz
IPAddress subnet( 255, 255, 255, 0 ); //subnet
char server[] = "smtp server ip"; //SMTP Mail Server
int port = 587;//SMTP PORT
EthernetClient client;
//--------------------------------
int buzzerPin=7;

void setup()
{
//Lcd ve İp kodları
Serial.begin(9600);
dht.begin();
pinMode(buzzerPin,OUTPUT);
pinMode(4,OUTPUT);
digitalWrite(4,HIGH);
Ethernet.begin(mac, ip, gateway, gateway, subnet);
lcd.init();                      // initialize the lcd
// Print a message to the LCD.
lcd.backlight();
lcd.setBacklight(HIGH);
lcd.clear();
lcd.print("ANTIKKKAPI OTS");
delay(2000);
lcd.clear();
lcd.print("HOSGELDINIZ");
delay(1000);
lcd.clear();
// delay(2000);
// Serial.println(F("Ready. Press 'e' to send."));
//-------------------------------------------------
}
//tanımlamalar
 float h;
 float t;
 bool messageSentBool;
 bool messageSentBool2;
 bool messageSentBool3;
 bool mailgonder=false;
 //---------------------------
void loop()
{
 // Wait a few seconds between measurements.
  delay(2000);

  // Reading temperature or humidity takes about 250 milliseconds!
  // Sensor readings may also be up to 2 seconds 'old' (its a very slow sensor)
  h = dht.readHumidity();
  // Read temperature as Celsius
  t = dht.readTemperature();

  // Check if any reads failed and exit early (to try again).
  if (isnan(h) || isnan(t)) {
    lcd.clear();
    lcd.print("DHT HATA!");
    return;
  }
 //Print temp and humidity values to LCD
    lcd.setCursor(0,0);
    lcd.print("NEM: ");
    lcd.print(h);
    lcd.print("%");
    lcd.setCursor(0,1);
    lcd.print("SICAKLIK: ");
    lcd.print(t);
    lcd.println("C");

//----------------------
   delay(2000); //Delay 2 sec between temperature/humidity check.
//-----------------------------------

//Nem ve Sıcaklık yüksekse mail gönder
  if(h > 60 && !messageSentBool2) { //nem 60 'ın üstündeyse

   mailgonder=true;
   messageSentBool2 = true;

  }
  if(h < 60)
   {
      messageSentBool2=false;
   }
//buzeer aktif
   if(h > 60) {
   digitalWrite(buzzerPin,HIGH);
   delay(4000);
   digitalWrite(buzzerPin,LOW);
   lcd.clear();
   lcd.print("NEM YUKSEK");
  }
 //---------------------------------


//Nem ve Sıcaklık yüksekse mail gönder
//sıcaklık 27 derecenin üstündeyse
  if(t > 27 && !messageSentBool3) {

  mailgonder=true;
  messageSentBool3 = true;


  }
 if(t < 27)
   {
      messageSentBool3=false;
   }
 //buzzer aktif
  if(t > 27 ) {
   digitalWrite(buzzerPin,HIGH);
   delay(4000);
   digitalWrite(buzzerPin,LOW);
   lcd.clear();
   lcd.print("ISI YUKSEK");
  }
 //---------------------------------


//Mail Gönderme Fonksiyonu
//byte inChar;

  //inChar = Serial.read();

 // if(inChar == 'e')

if(mailgonder==true)
  {
      if(sendEmail()) Serial.println(F("Email sent"));
      else Serial.println(F("Email failed"));
      mailgonder=false;
  }
  //------------------------------------------------------
  }

//loop son---
//Mail Fonksiyonu
byte sendEmail()
{
  byte thisByte = 0;
  byte respCode;

  if(client.connect(server,port) == 1) {
    Serial.println(F("connected"));
  } else {
    Serial.println(F("connection failed"));
    return 0;
  }

  if(!eRcv()) return 0;

  Serial.println(F("Sending hello"));
// replace 1.2.3.4 with your Arduino's ip
  client.println("EHLO 1.2.3.4");
  if(!eRcv()) return 0;

  Serial.println(F("Sending auth login"));
  client.println("auth login");
  if(!eRcv()) return 0;

  Serial.println(F("Sending User"));
// Change to your base64 encoded user
  client.println("Mail Kullanıcı Adı base64 olarak");

  if(!eRcv()) return 0;

  Serial.println(F("Sending Password"));
// change to your base64 encoded password
  client.println("Mail şifre base64 olarak");

  if(!eRcv()) return 0;

// change to your email address (sender)
  Serial.println(F("Sending From"));
  client.println("MAIL From: <Alici Mail Adresi>");
  if(!eRcv()) return 0;

// change to recipient address
  Serial.println(F("Sending To"));
  client.println("RCPT To: <Gönderici Mail Adresi>");
  if(!eRcv()) return 0;

  Serial.println(F("Sending DATA"));
  client.println("DATA");
  if(!eRcv()) return 0;

  Serial.println(F("Sending email"));

// change to recipient address
  client.println("To: BILGIISLEM <alicimail yaz>");

// change to your address
  client.println("From: ANTIKKAPI OTS <gönderenmailı yaz>");

  client.println("Subject: SISTEM ODASI UYARI\r\n");


  client.print("NEM % :");
  client.println(h);
  client.print("SICAKLIK C :");
  client.println(t);
  client.println(".");


  if(!eRcv()) return 0;

  Serial.println(F("Sending QUIT"));
  client.println("QUIT");
  if(!eRcv()) return 0;

  client.stop();

  Serial.println(F("BAGLANTI KESILDI"));

  return 1;
}

byte eRcv()
{
  byte respCode;
  byte thisByte;
  int loopCount = 0;

  while(!client.available()) {
    delay(1);
    loopCount++;

    // if nothing received for 10 seconds, timeout
    if(loopCount > 10000) {
      client.stop();
      Serial.println(F("\r\nTimeout"));
      return 0;
    }
  }

  respCode = client.peek();

  while(client.available())
  {
    thisByte = client.read();
    Serial.write(thisByte);
  }

  if(respCode >= '4')
  {
    efail();
    return 0;
  }

  return 1;
}
void efail()
{
  byte thisByte = 0;
  int loopCount = 0;

  client.println(F("QUIT"));

 while(!client.available()) {
    delay(1);
    loopCount++;

    // if nothing received for 10 seconds, timeout
    if(loopCount > 10000) {
      client.stop();
      Serial.println(F("\r\nTimeout"));
      return;
    }
  }
 while(client.available())
  {
    thisByte = client.read();
    Serial.write(thisByte);
  }
 client.stop();
 Serial.println(F("BAGLANTI KESILDI"));
}
Kodu Ardunio ide ye atıp cihaz gönderdiğinizde sistem sorunsuz çalışacaktır.
Bu uygulamanın daha gelişmiş hali olan ilgili sıcaklık ve nem değerlerinin zabbix üzerinden monitoring edilmesi ve belirtilen değerlere eşit ise telegram üzerinden bildirim göndermesiyle alakalı yazım için takipte kalın 🙂